
In this post we’ll go through a step by step guide to making your very own DIY plant pots.
I decided to make some of my own plant pots as I had quite a bit of sand and cement left over from a building job and wanted to put the leftovers to good use. Plus my darling wife was getting a little fed up with the sand being sat on the drive 🙂
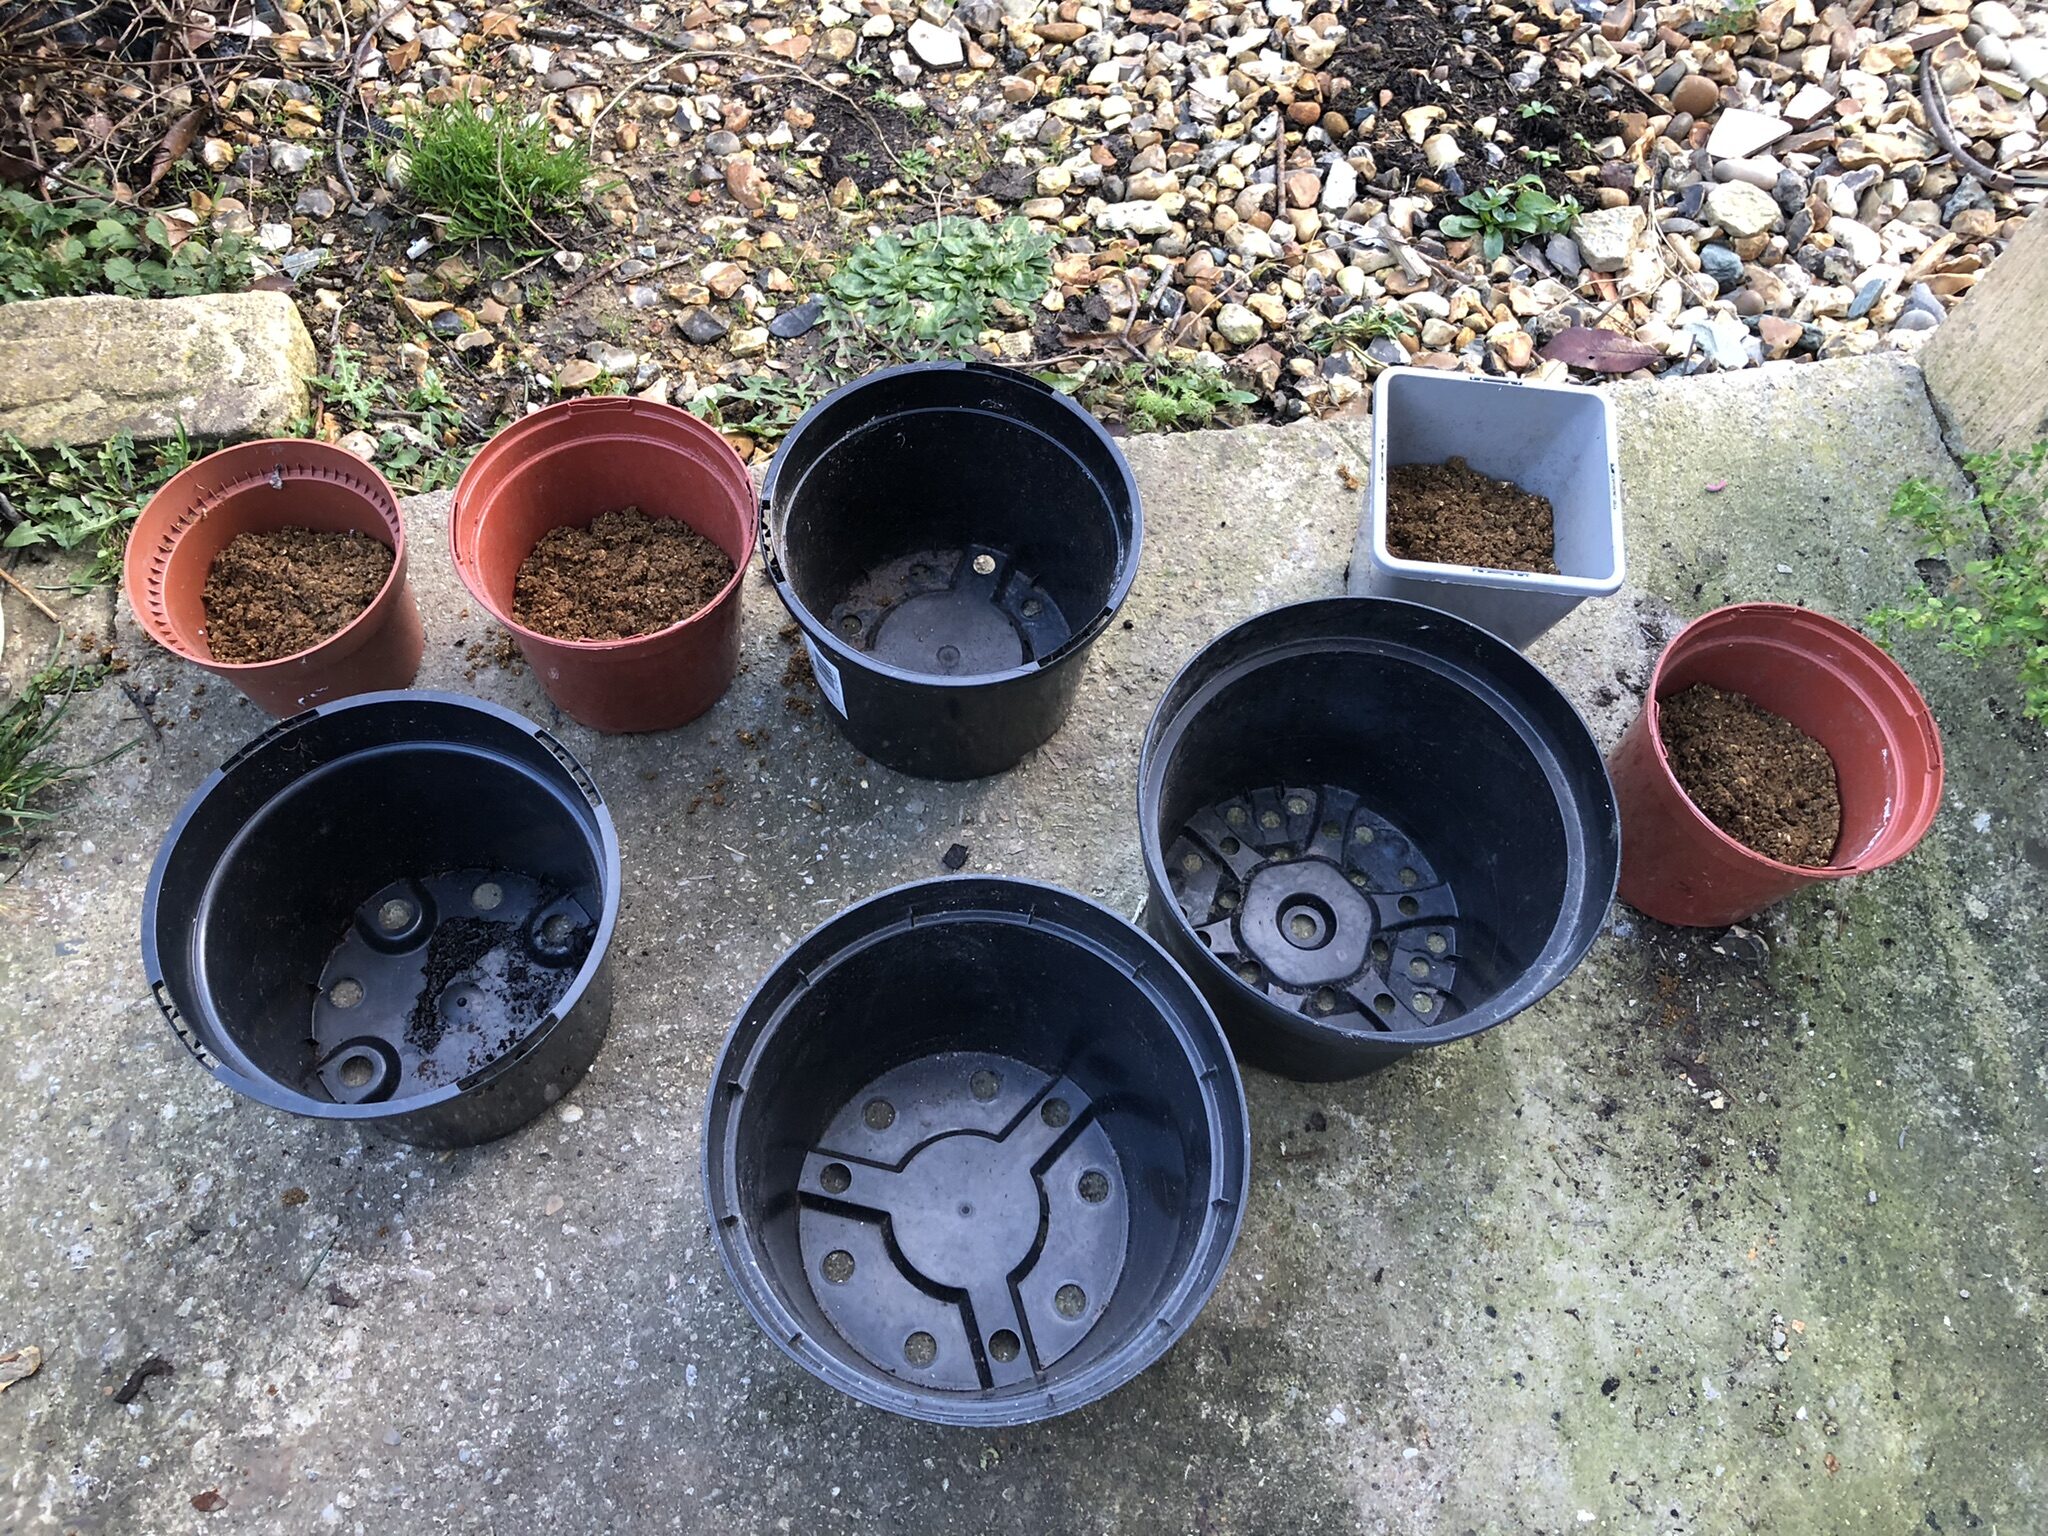
This guide is by no means the only way to make a concrete plant pot. You don’t necessarily need all tools listed. Also when choosing the size and shape of your plant pots you can use anything as your cast but be warned you may need to destroy this to get the finished plant pot out. This is why I used old plastic pots. I then recycled some of them into home made plant tags.
What you will need
- Sand
- Cement
- A couple of old plastic pots
- Trowel
- Bucket for mixing
How to make a DIY plant pot
Step 1
Choose you pots. You will need two pots for each plant pot you wish to make. These pots should be roughly an inch or so difference in size and of a similar height.
Step 2
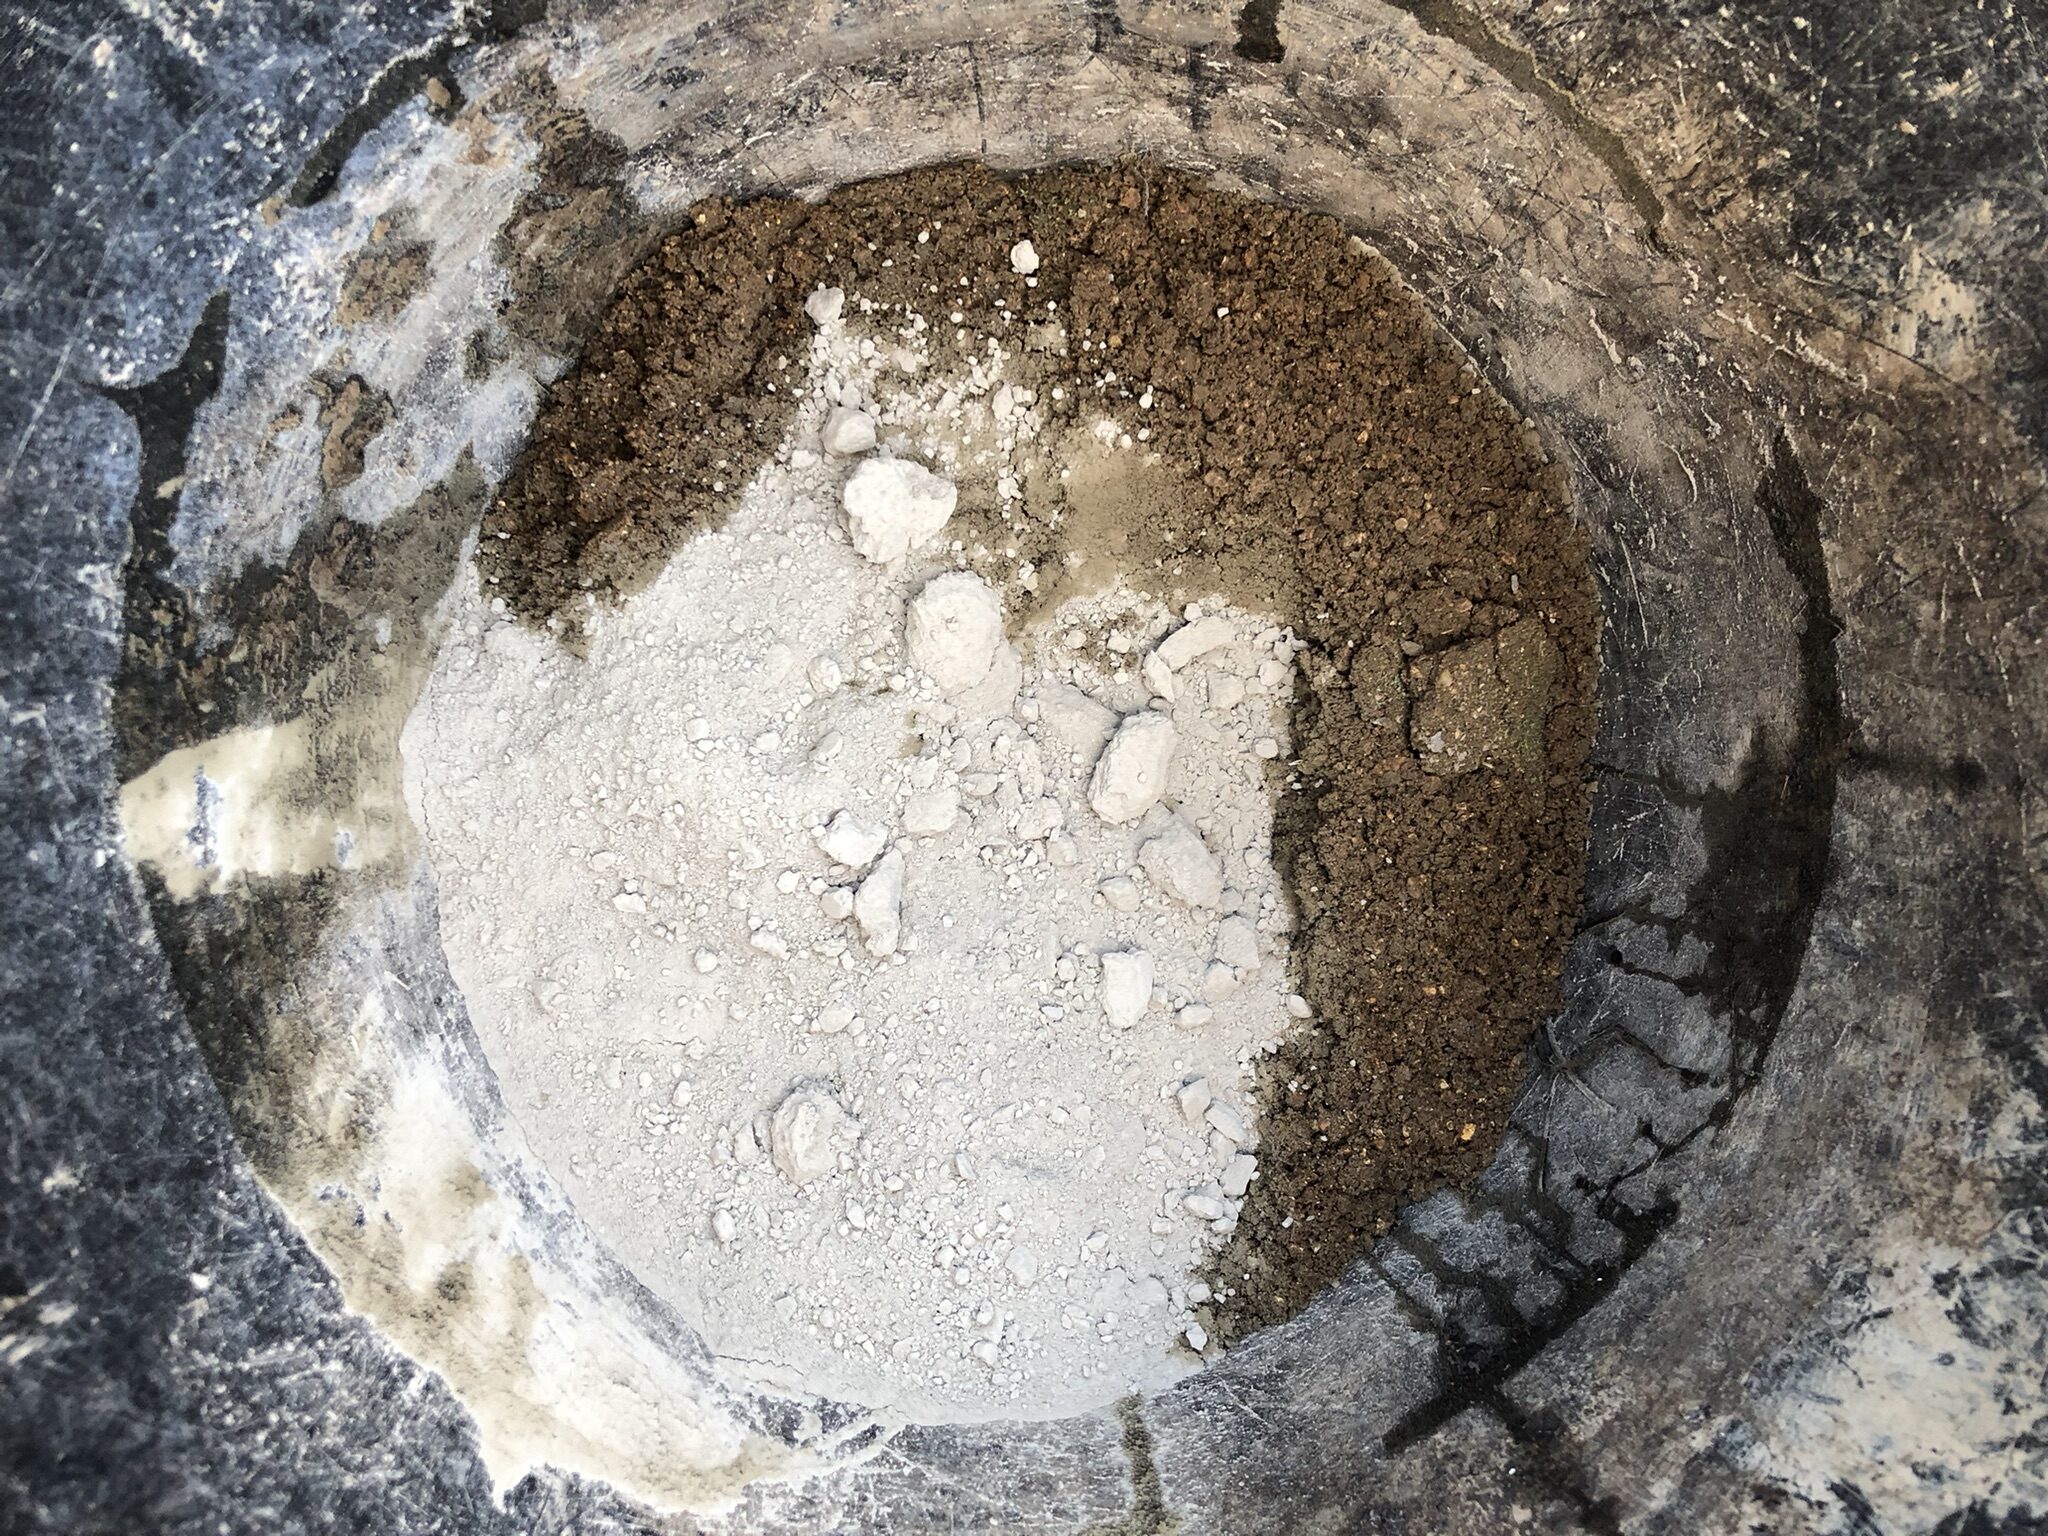
Mix the concrete. For this tutorial I used a mix of 3:1 sand to cement. This is a rough rule of thumb ratio. I will create some with slightly different ratios to se me what works or looks best and update this post.
I used standard building sand but you could also use ballast for a rougher finished texture for your pots.
Add 3 parts sand to 1 part cement and mix adding a little water at a time. Keep mixing and adding water until everything is mixed thoroughly. The consistency to look for is something damp that holds together when squeezed into a ball but not dripping water.
Step 3
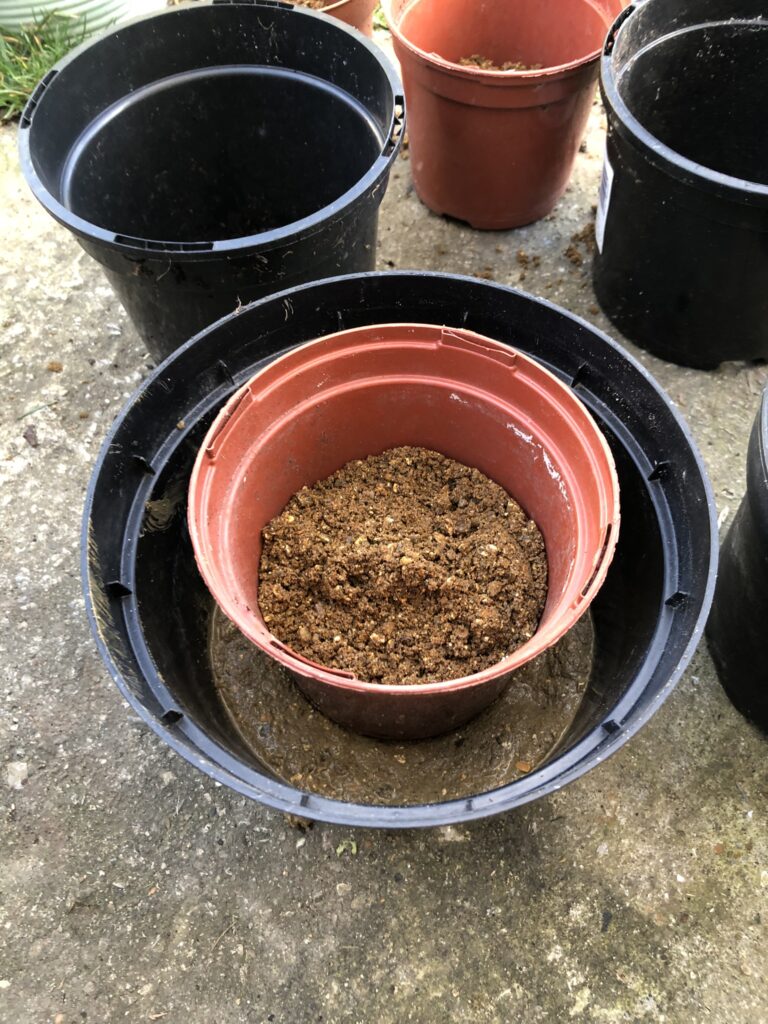
Fill the larger pot with about an inch of concrete and press in firmly. This gives the plant pot a good heavy base for stability.

Step 4
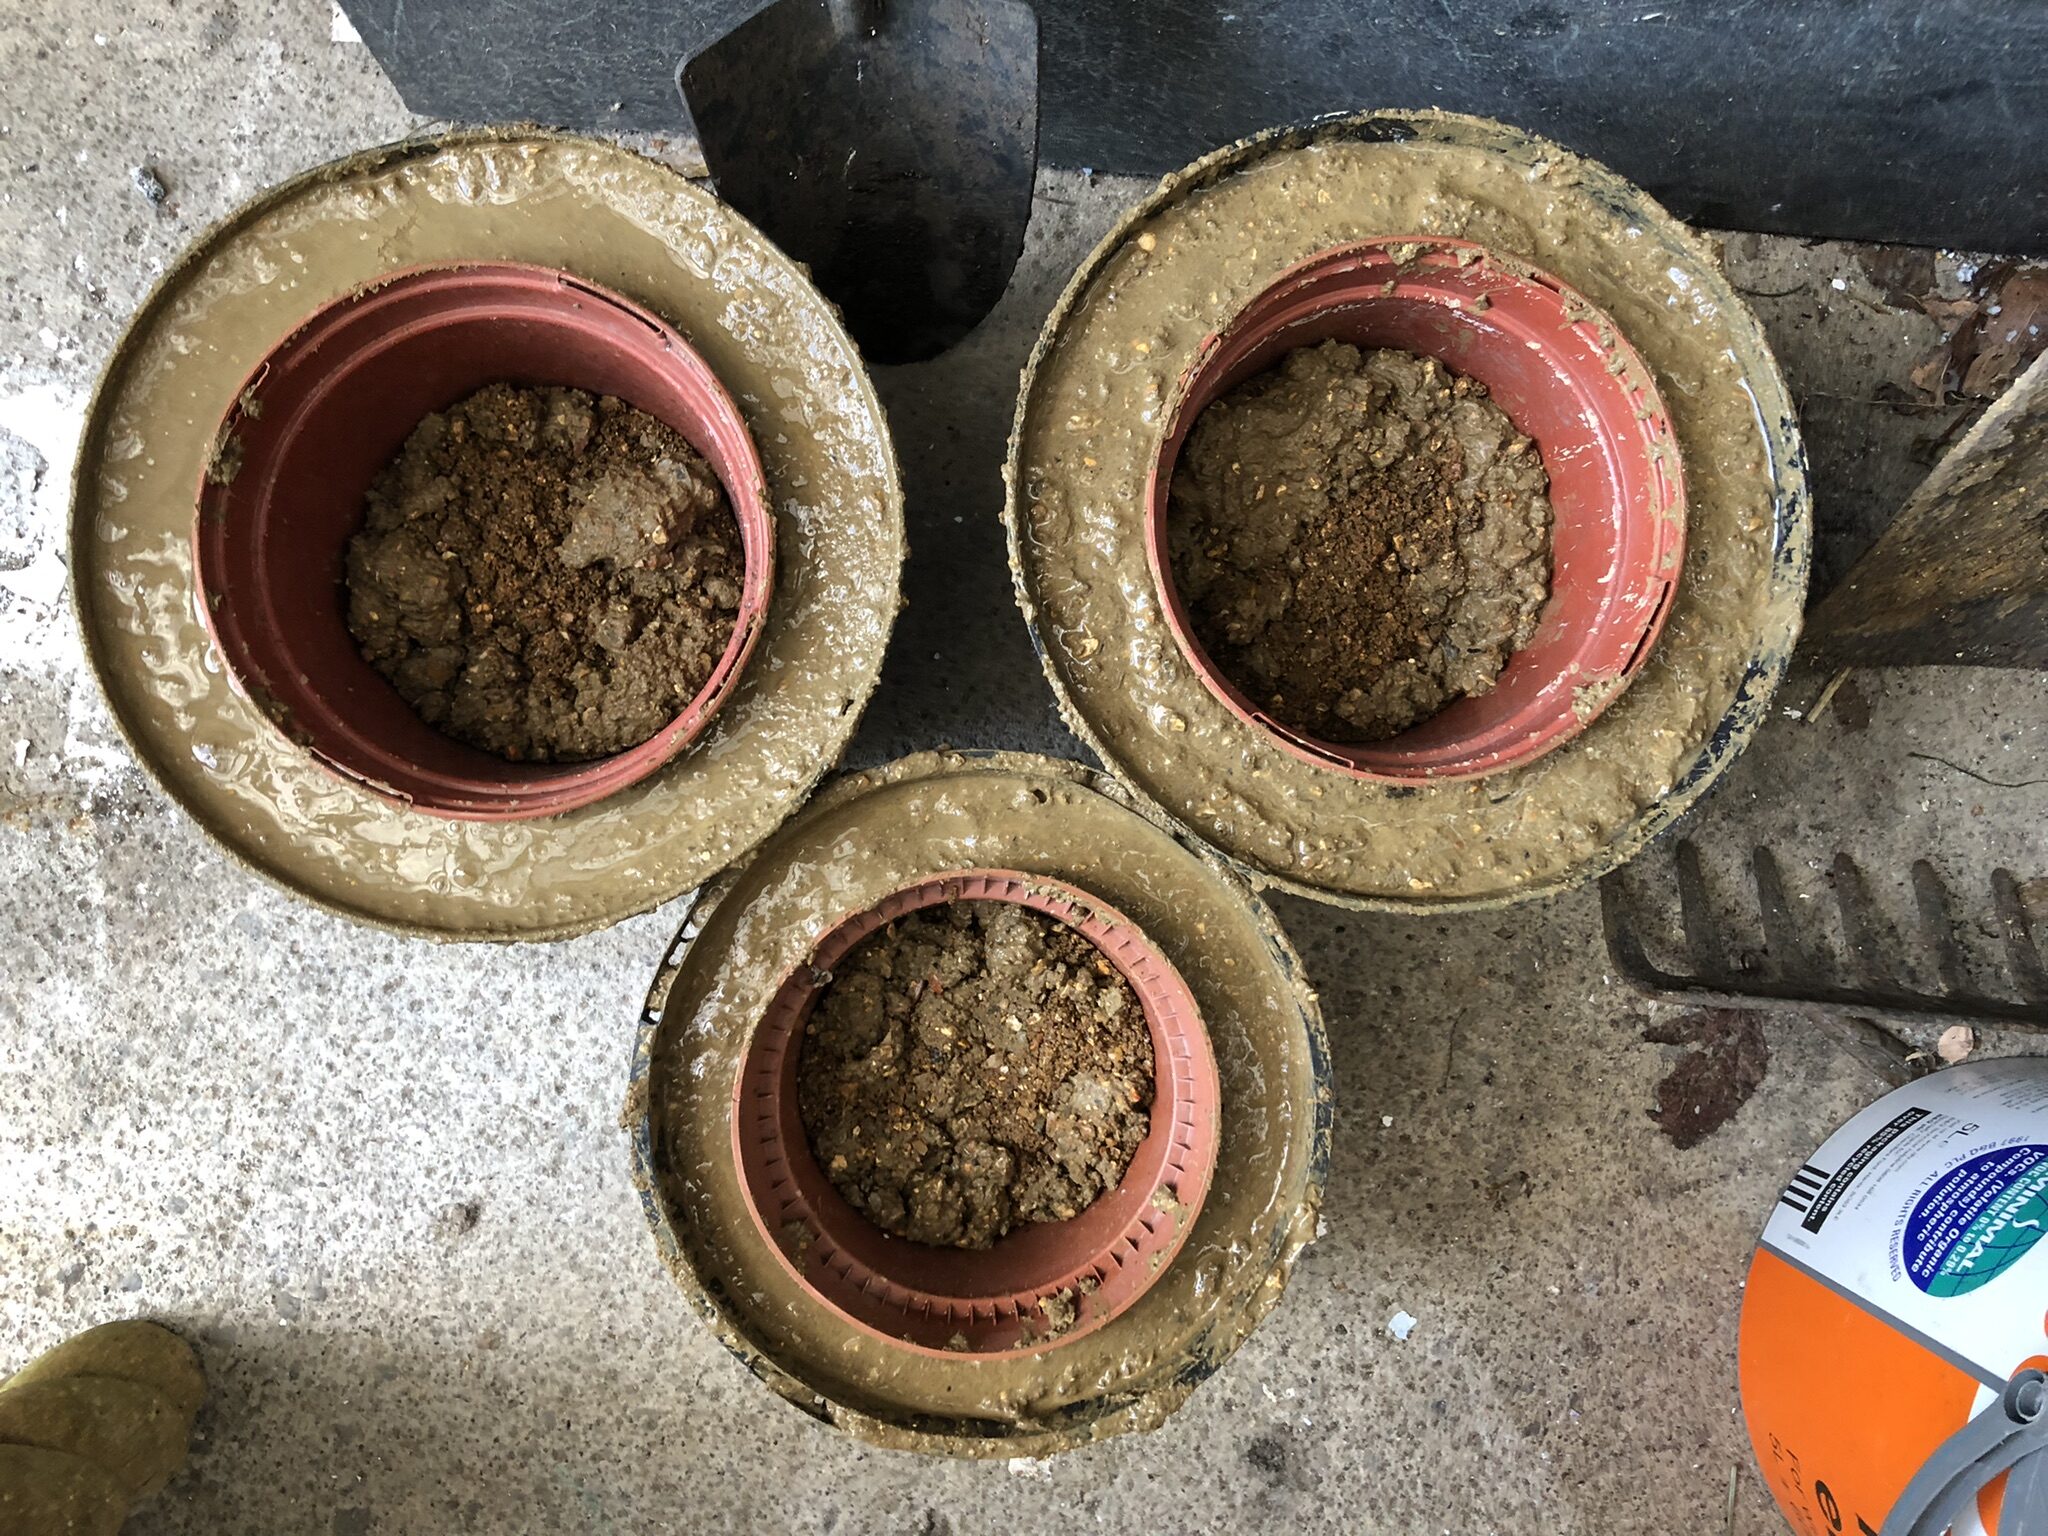
Place the small pot inside, this will create the cavity of your new plant pots. Ideally the top of this pot should be level or higher than the outer pot.
I half filled my with sand to help keep it weighted down.
You could use something across the top of the pots to hold the inner one from moving as you fill with cement ( but tbh I didn’t bother).
Step 5
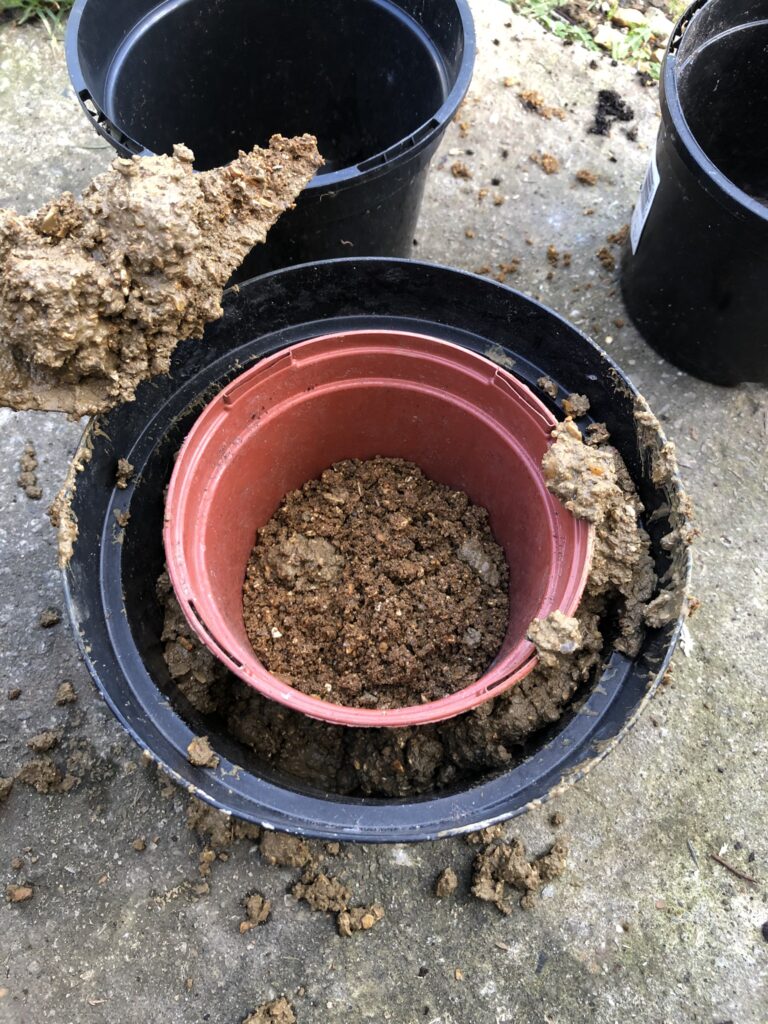
Fill the gap between the two pots. Little by little drop the cement into the gap. As you fill make sure to push the cement down as far as you can with a trowel or gloved fingers, also remember to tamp the cement down into place by dropping your pot from a few centimetres high, this will help remove smaller air bubbles.
Step 6
Fill the gap between pots as high as you can without it spilling out the top. Smith down the top of the cement as best you can with the tools you have available.

Step 7
Set the new casted pots aside and allow them to dry. Depending on size, weather conditions, mix ratio drying times will vary. It’s should probably take a few days for the pots to dry.
I put a weight on the inner cup to hold it in place whilst it dried.
Step 8
Once dried fully remove the inner and out pots and that it’s you’ve made your very own DIY plant pots!

Yours to paint if you choose and keep forever. The plant pots pictured probably cost me all of 20p to make, a great cost effective gardening project.

Depending on what you’ve used you may need to destroy the pots used for the mould. I used old plastic plant pots (of which we all have a stack or two) so wasn’t worried about breaking them.
I’ve now chopped up the pot carcasses for home made plant tags.
See more of our DIY garden projects in the Guides section of the site.